# HTML Editing
Mail Studio is a visual editor, and as such HTML can't be edited directly. The application generates HTML code from the components that you add to your page and the options that you choose for them.
You can do nearly everything from the visual tools which Mail Studio gives you, and for cases where you need HTML editing, you can achieve it with the Custom Code component.
# HTML Tab
This is one of the two non-closable tabs in the Editor panel. It gives you an overview of the generated page's HTML. Although code in this window can't be edited, you can set class names and attributes to elements.
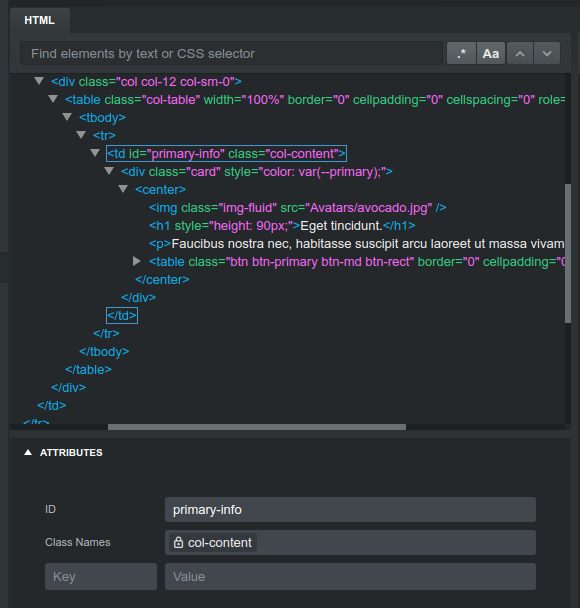
Left clicking an HTML element will select it (updating the Styles tab in the process). Double clicking will open the Attributes panel. Right clicking will show a context menu with useful options, like changing the type of element, copying it as HTML and copying the element's attributes so they can be pasted to another.
# Searching
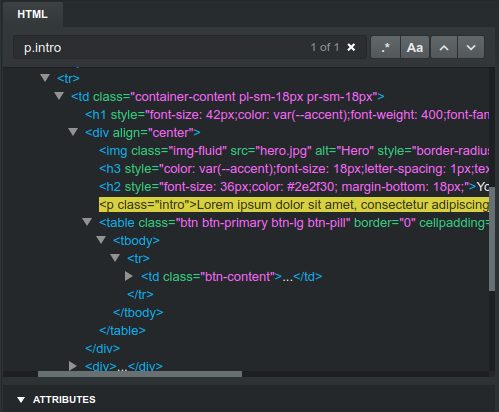
You can search in your page's HTML by text or CSS selector. Thanks to the power of CSS selectors, some pretty advanced searches are possible:
p.someclass- paragraphs with a specific class namea[href=""]- links with empty hrefsimg:not([alt])- images without alt attributesh2 + p- select only paragraphs that are preceded by h2 tagsh1:first-child- h1 tags that are the first element in their parent
# Editing Attributes
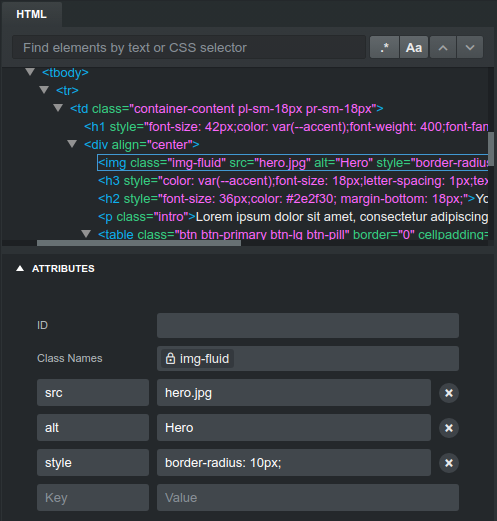
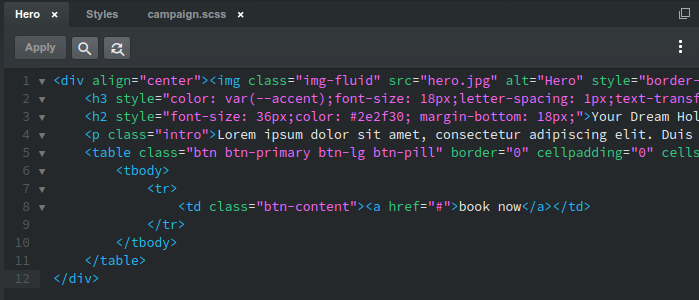
Beneath the HTML preview you can see the Attributes panel. Click to expand it if it isn't visible in its entirety. This panel lets you add an ID, class names and other attributes to the selected HTML element.
To navigate the Attributes form use Tab, Shift+Tab and Enter. The attributes are applied automatically to the element, and full Undo/Redo history is retained.
Note
You can add any CSS class that you wish, but some, like in img-fluid above, are locked. To change locked classes in Mail Studio, you need to modify the component's options.
# Head Content
Sometimes you need to place specific code in the <head> of your pages. This can be done from the Head Content section in the Settings dialog.
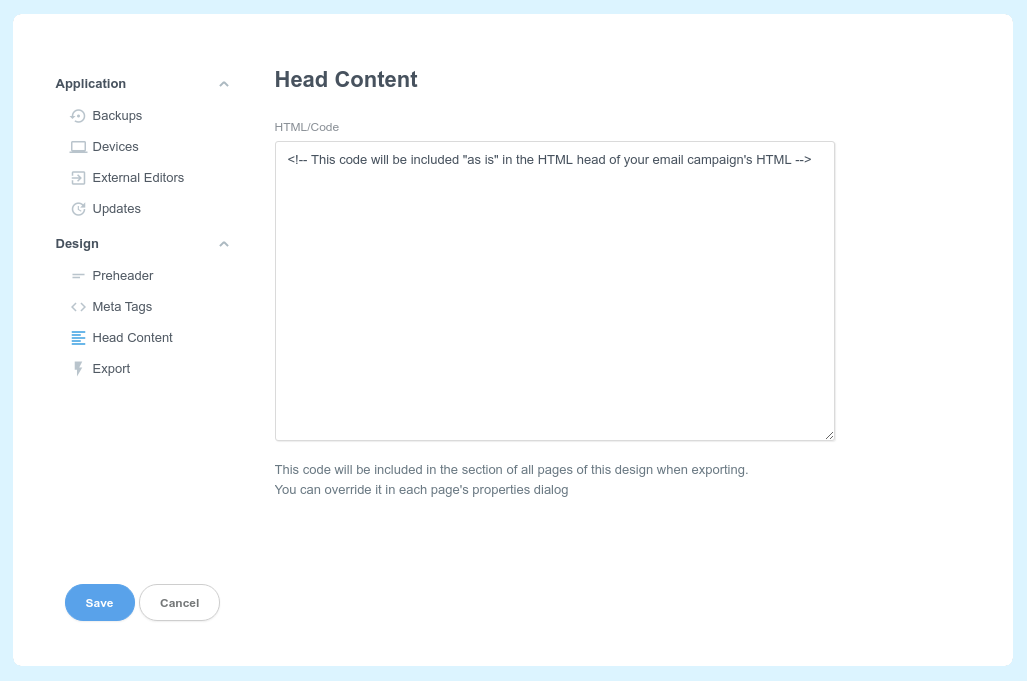
This will be added to all pages of your design when you're sending preview emails or when exporting. If you wish to add head content to a specific page of your design, you can do so by right clicking the page in the Design panel and choosing Properties
# Meta Tags
As a more structured alternative to Head Content, you can add specific meta tags to your pages, from the Settings dialog.
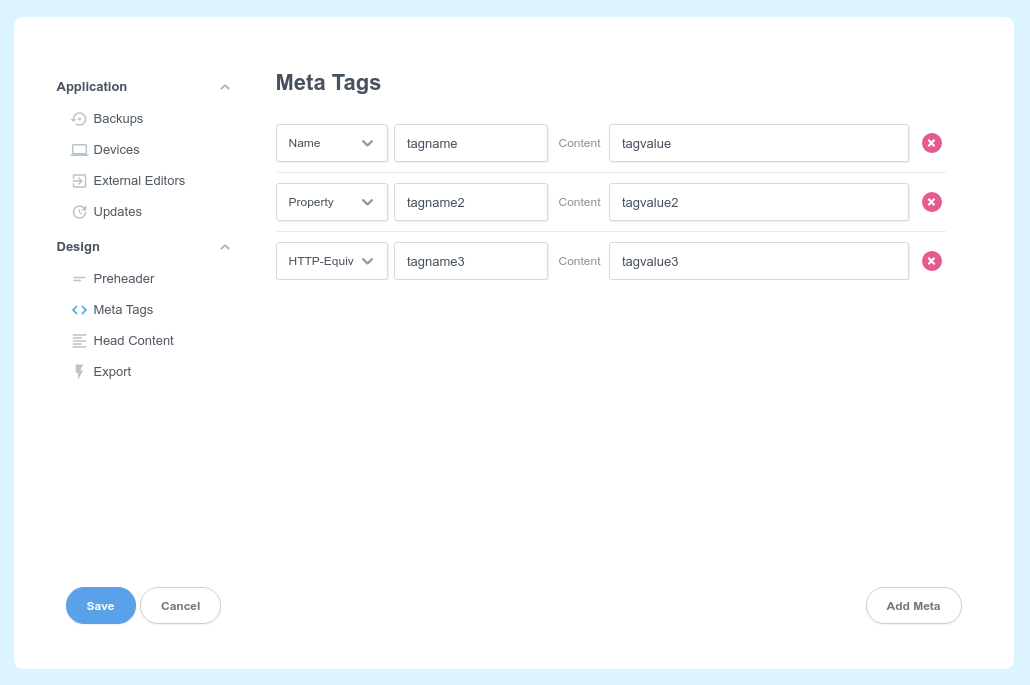
As with Head content, this will apply to all pages of your design. If you wish to add meta tags to a specific page, you can do so by right clicking the page in the Design panel and choose Properties.
# Writing HTML
If you need to write unrestricted HTML in Mail Studio, you can do so with the help of the Custom Code component. It's a powerful tool, which lets you freely edit its content as HTML. The app doesn't attempt to parse or validate the code in any way, which opens the door to things like embedding server-side languages or tags which the application doesn't natively support.
# Converting Components to HTML
You can convert any component on the page to Custom Code and unlock it for editing by right clicking it and choosing Convert to HTML.
# Importing HTML
You can import externally created pages by dropping them onto the application window. One limitation to this is that externally created designs are imported as Custom Code and are only editable as HTML. Mail Studio treats them as a black box and doesn't attempt to parse them.
This method of importing is a way to get externally created pages in the app quickly, but it misses most of the benefits that Mail Studio brings in terms of visual editing. For those, you will need to recreate your design inside the application.