# Web Fonts in Email
On the web we get a rich choice of typography options. We have thousands of free web fonts to choose from, courtesy of Google Fonts. With the help of Mail Studio, these can also be used in your email designs.
Note
Although support for web fonts is getting better, only a minority of email clients will display your font. So make sure that the font fallbacks that you've chosen are a good substitute.
# Google Fonts
To start, right click the Fonts group in the Design panel. In the menu, choose the Manage Fonts option.

This will bring up the Google Fonts browser.
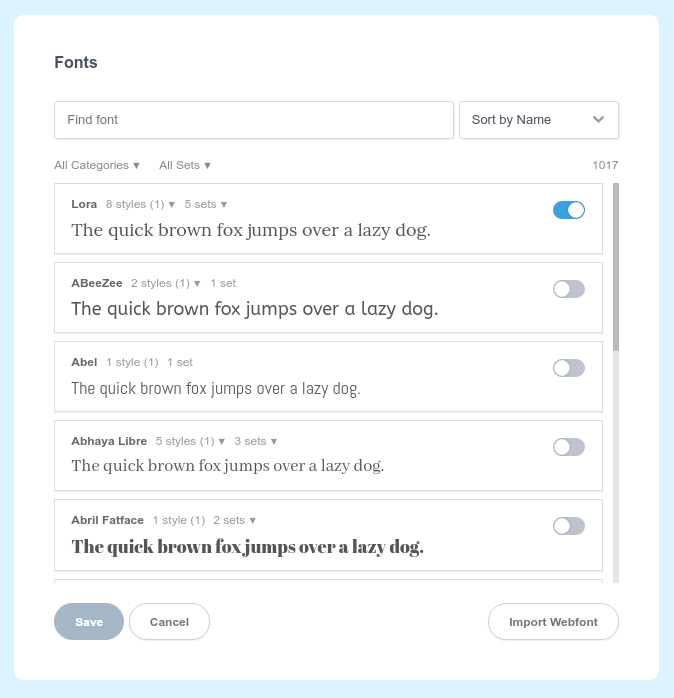
Here you can search for font families, filter by category and supported language, and activate the styles that you need.
TIP
You can change the "quick brown fox" text by clicking and typing.
After you Save your selection, you need to set it to an element on your page for it to be used.
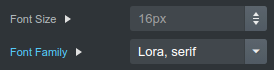
Remember to always include a fallback font after your web font. It will be used as a substitute in email clients that don't support the feature.
# Custom Fonts
Sometimes you need to use a custom font that is not available in Google Fonts. In this case, you can import your font directly in the app.
# Converting Your Font to a Web Font
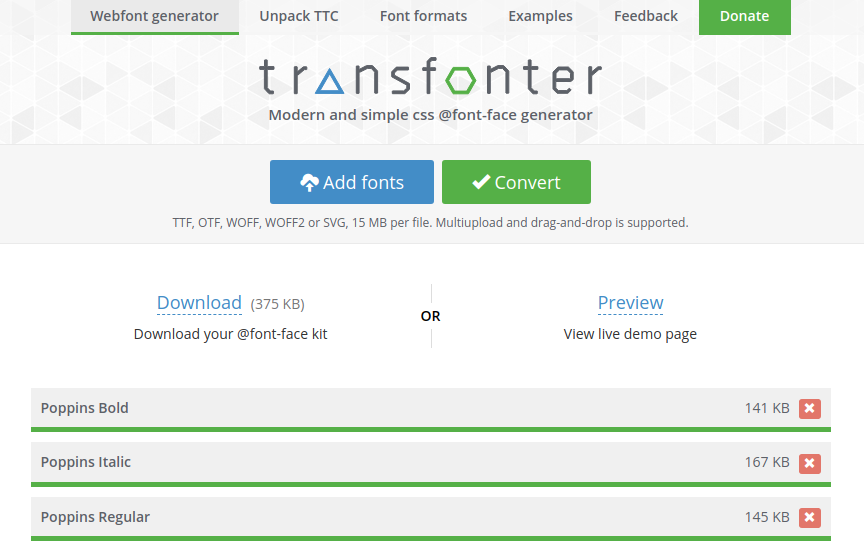
Only webfonts can be imported in Mail Studio. But thanks to free online tools like Transfonter (opens new window), you can convert any regular font format to a webfont. Just Add your font files and click Convert. This will give you a zip file with your webfont.
Note
Make sure that the license terms of the font you're converting permit using it on the web. In some cases, commercial fonts require a separate license for such use.
# Importing Your Web Font
After you extract the zip file you generated above (or if you already have a webfont), right click the Fonts group in Mail Studio and choose Import Webfont. In the file browser, navigate to the webfont and select the css file in the folder.

The CSS file of a webfont contains important meta data that describes the available weights and charsets of your font, which Bootstrap Studio uses to import your font correctly.
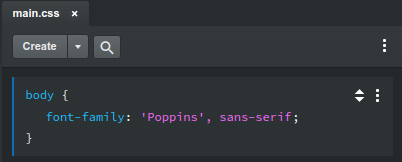
# Displaying the Font
All that remains is to set the font you imported as a font-family of an element on your page, by writing a bit of CSS. In the example below we've set the webfont to be used on the entire document, but you can easily limit this only to specific elements like headings.