# CSS Editing
Mail Studio gives you an entirely visual way of building email designs, by using the Appearance panel and component options. But, if you require extra control and customizability, you can write CSS code directly in the Editor panel.
The CSS editor that's built into Mail Studio will be familiar to anyone who's used their browser's developer tools. You can edit CSS code in the Styles tab, or in CSS files which you create in the Design panel.
# The Styles Tab
Styles is one of the two non-closable tabs in the Editor panel. It gives you a list of the CSS blocks in your design which match the currently selected component. This is a convenient way to discover which CSS blocks are affecting the component across all your files, and application-generated code.
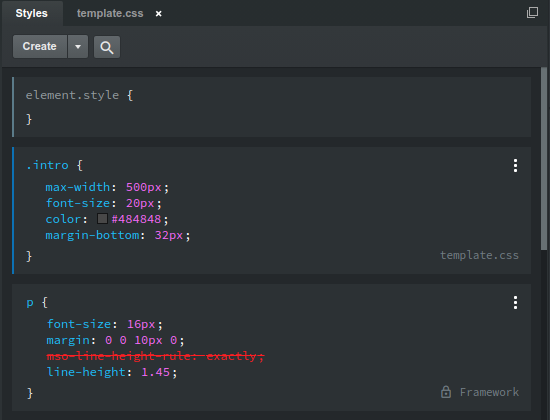
Note that the app-generated styles (labeled as "Framework") are locked and are not user editable. You can override them by clicking the three dot menu of the block and copying it to your own stylesheet.
# CSS Files
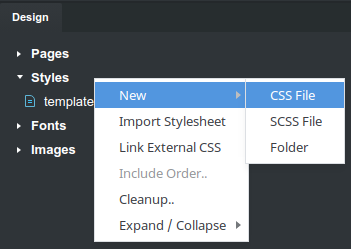
Creating a new CSS file is easy. Just right click the "Styles" label and choose the New > CSS File menu.
To import an existing CSS file, just drag and drop it onto the application window. It will be parsed and added in your design.
You can create/import as many files as you wish, and organize them into folders to make them easier to manage.
# CSS File Order
When working with multiple CSS files, you will sooner or later run into a situation where you need to control the precedence of files. To change the order in which CSS files are applied, right click the Styles group and select Include Order.
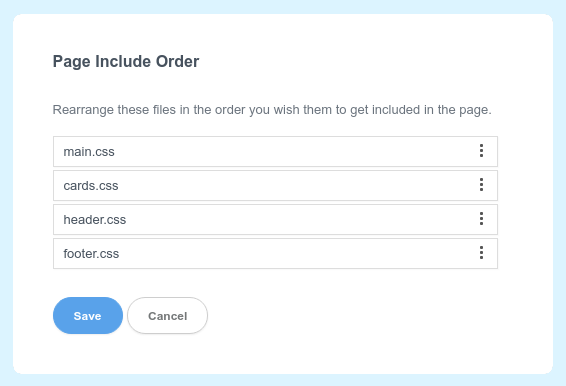
Here you can reorder the files as you need them and then click the Save button. These changes will be applied to all pages in your design.
Note
Although it isn't shown in the dialog, the application generated framework css file is always included first in the page, before your stylesheets.
# Visibility
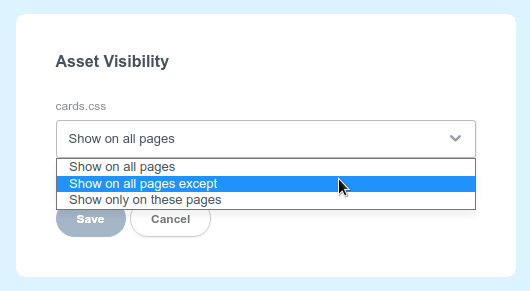
When right clicking a CSS file, you get a couple of options for controlling its visibility.
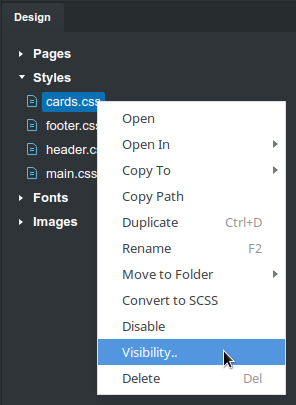
- Enable/Disable - with this option you can disable a stylesheet, so that it doesn't apply in any of your pages.
- Visibility.. - this will open a dialog which lets you choose which pages of your design should the stylesheet be added to.
# Linking External CSS
You can link externally hosted stylesheets in Mail Studio. Just right click the Styles group and choose Link External CSS. In the dialog you can paste a URL to an externally hosted stylesheet and it will be added to your design. When exporting, if you've enabled the Process CSS option, Mail Studio will fetch the remote CSS code and inline it alongside the rest of your CSS files.
# Editing CSS
Double click a CSS file and it will be opened for editing in our CSS editor. Click on a selector, css property or a value to edit them. Hit Enter or Tab to move to the next rule, and Shift+Tab to the previous. You can click the space between rules to create new ones, and between css blocks to create new blocks or comments.
Images and fonts that you've added to the Design panel will be automatically picked up and shown as suggestions when appropriate. There is a full undo/redo history, so feel free to experiment!
# Option Menu
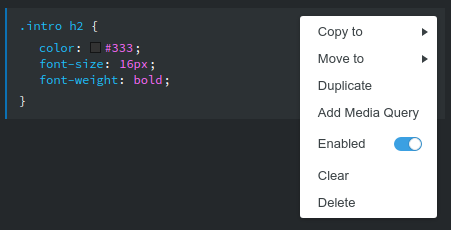
When you click the three dots on the top right of each CSS block, you will see a menu with options. You have the basic operations like copy, move and delete, but also the option to add a media query and enabling/disabling the block.
# Multi Selection
Click CSS blocks while holding the Ctrl/Shift (Windows/Linux) or Cmd/Shift (Mac) keys to initiate a multi selection. This gives you quick actions to apply en masse.
# Writing Media Queries
Media Queries are an important tool for creating responsive layouts. In Mail Studio, media queries are assigned on a block by block basis. To do this, choose Add Media Query from the Option menu (the three dots on the top right of the block).

The query will be prefilled with a min-width or max-width depending on the current width of the stage.
TIP
If you find our CSS editor too restrictive, you can always switch to writing SASS code.
# CSS Variables
Mail Studio makes use of CSS custom properties (opens new window) (also known as variables). They give you an easy way to reuse a specific color throughout your design and change it from a central location. Some of our templates redefine these colors, so that all built-in components in the Component panel will match the style of the template.
Here is an example of the color variables that are defined by Mail Studio. You can, of course, define new variables and redefine the built-in ones in your stylesheets.
.body-content {
	--primary: #0a6fe4;
	--secondary: #6c757d;
	--success: #28a745;
	--info: #17a2b8;
	--warning: #ffc107;
	--danger: #dc3545;
	--light: #f8f9fa;
	--dark: #343a40;
	--gray-light: #dee2e6;
	--gray-dark: #6c6c6c;
}
To make use of CSS variables, just include them in place of color values.

Defining your own custom properties, or overriding the built-in ones is straightforward. You can do it by writing code like the following in one of your css files:
.body-content {
	--primary: #123456; /* This will redefine the primary color */
	--myWonderfulColor: #654321; /* This is a new property */
}
After you've made changes to the --primary color, it will be used throughout the design and automatically style buttons and other components.
Compatibility and Limitations
You won't be surprised to learn that CSS variables are not natively supported in email clients. This is why, when exporting, be sure to switch on the Process CSS option. When enabled, Mail Studio scans your design's CSS, evaluates all variables and rewrites them as static values (e.g. color: var(--primary); becomes color: #123456;).
This works great in most cases, but there is one limitation. This technique can not work with dynamically modified variables (like redefining a CSS variable in :hover selectors or media queries). These redefines will have no effect, because the value declarations are turned into static values during export.
