# Exporting
After you finish your design in Mail Studio, you will need to upload it on your Email Marketing Platform of choice, or hand it off to a developer to integreate it with an existing system. In all cases, you will need to export your design as HTML.
Mail Studio makes this easy. Just hit the File > Export menu, and your design will be converted to HTML, CSS and Image files.
# Export Settings
A number of export settings are available, which can affect the way HTML is generated. Click the File > Export > Export Options menu item, and you will be presented with the Export Settings dialog.
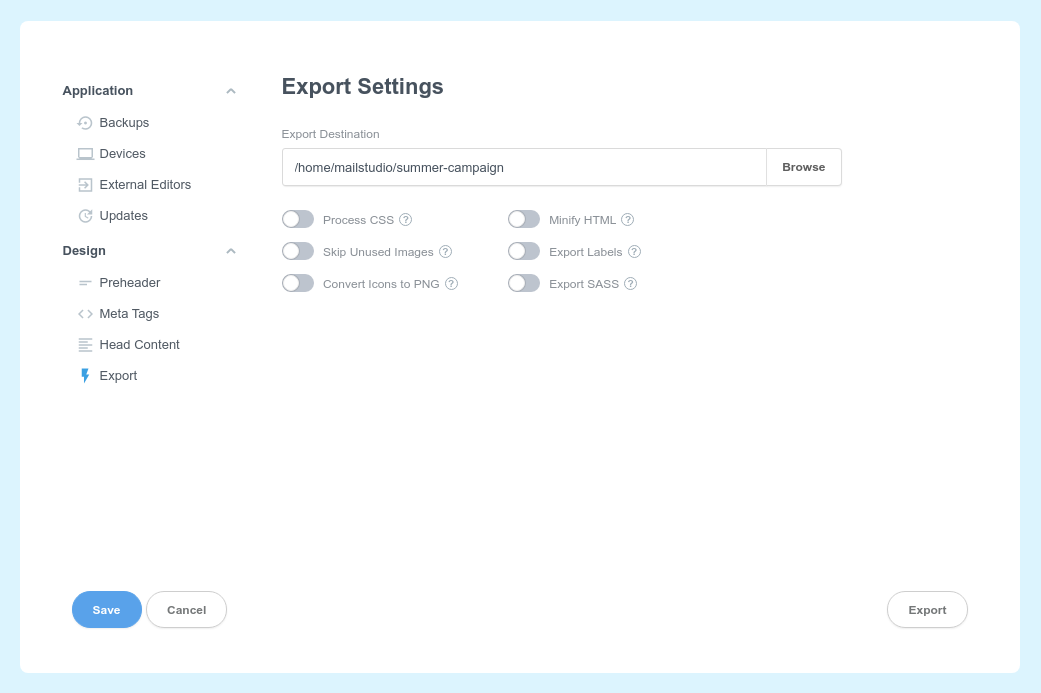
Here, you have a number of options at your disposal:
- Process CSS - Enabling this option will tell Mail Studio to scan all CSS of your design, and rewrite it as HTML
styleattributes on the matching elements. Additional processing steps are also performed (like evaluating CSS variables), so it is recommended to switch this on for the widest compatibility with email clients. - Skip Unused Images - Will scan whether the images you've imported in your design are used or not, and will write to disk only does that are.
- Convert Icons to PNG - Each Icon component in Mail Studio is an inline SVG. Since SVG has very poor support in email clients, you most likely want to turn this option on, so that icons are converted to PNG during export.
- Minify HTML - Enable this option to have extra whitespace removed from the exported HTML. This can be useful if you are dealing with a provider that imposes a maximum length on email campaigns.
- Export Labels - Labels are additional text elements that are shown next to your components in the Overview panel. Normally, they are ignored when exporting, but if you enable this option, they will be inserted as
<!-- Start: XXX -->and<!-- End: XXX -->comments in the HTML. - Export SASS - If you have SASS files in your design, switch this option on to have the SASS sources exported. By default only the compiled css is written to disk.
Save your settings, and when you next click the Export button, your design will be written to the folder you've selected.
# Exporting a Single Page
If your design consists of multiple pages, you may export only a specific one. Just right click the page in the Design panel and choose Export. This will write only the selected page and alongside the CSS and Image files that it uses.
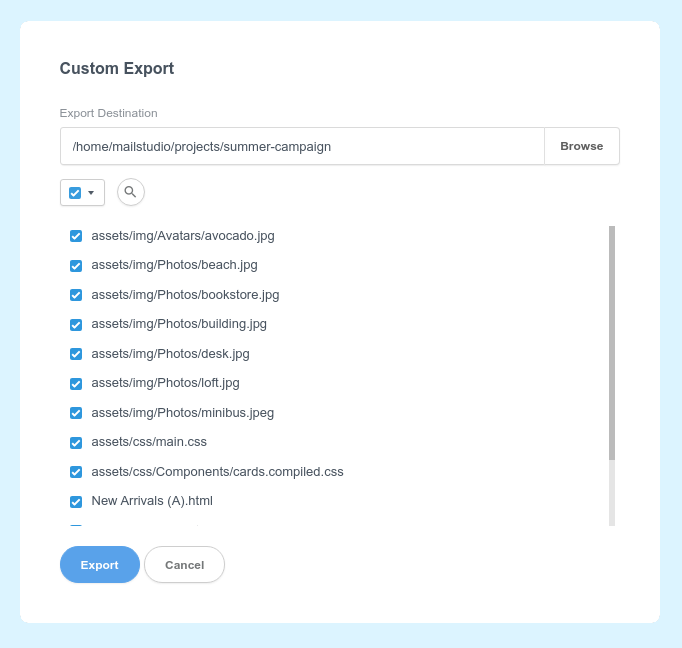
# Custom Export
For a more fine-grained experience, you can choose the File > Custom Export menu. In the dialog you can filter files by type and select only the files that you wish to export.
← Importing Previewing →